SmarterMail 7.x series
6. How to create calendar entries in SmarterMail
This tutorial will show you how to create calendar entries in SmarterMail
This tutorial assumes you are already logged in to SmarterMail
1) Click Calendar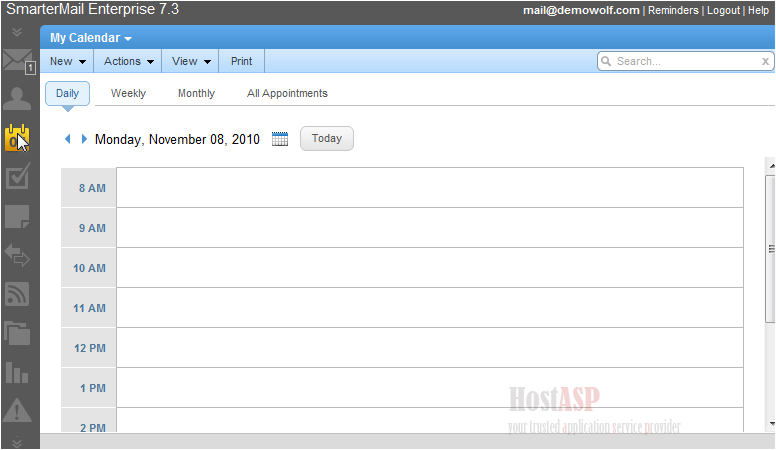
2) Click New Appointment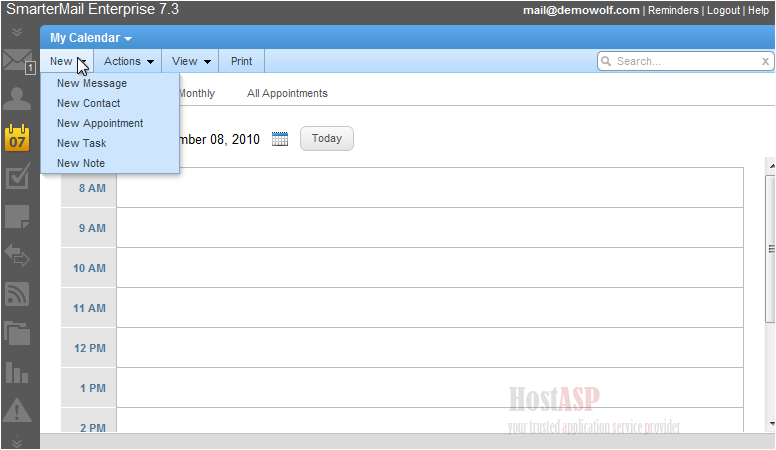
A new window will pop-up
3) Enter the subject for the new calendar entry
You can invite attendees from your contact list
4) Select the contact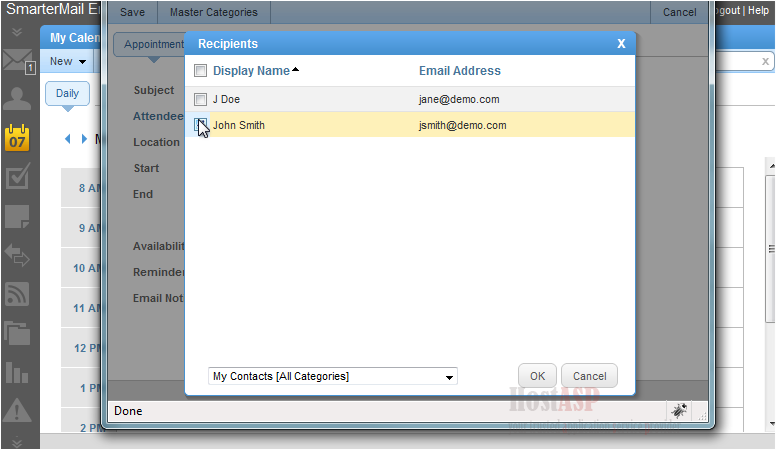
5) Click OK
6) Enter the location of the meeting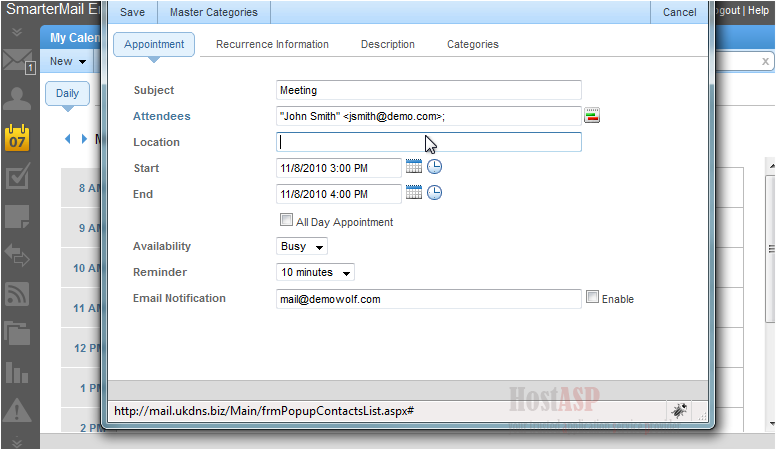
7) Select the start date from the pop-up calendar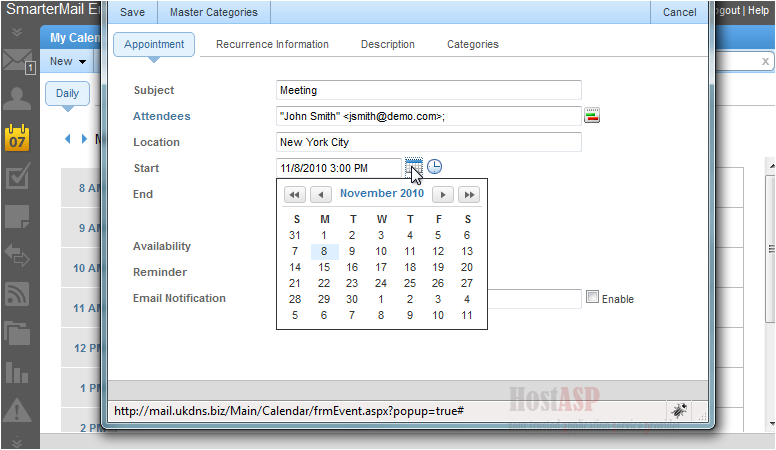
8) Select the start time from the pop-up menu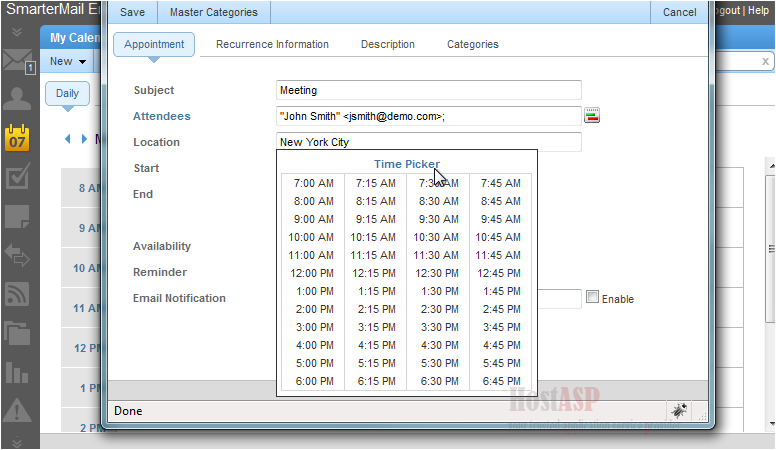
You can also select the end date and time
You can have an email reminder sent to you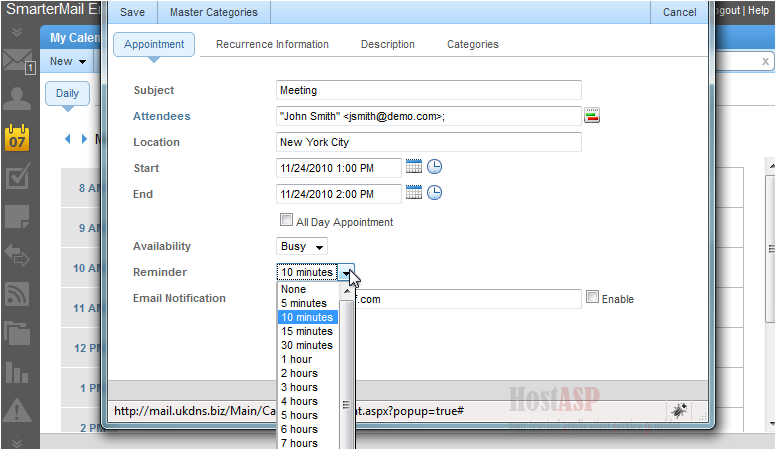
9) Enter the email address you want the reminder sent to and click Enable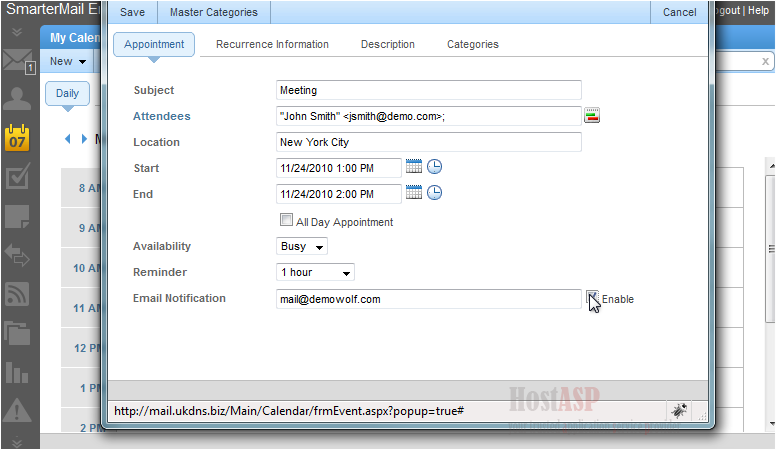
You can set the recurrence information here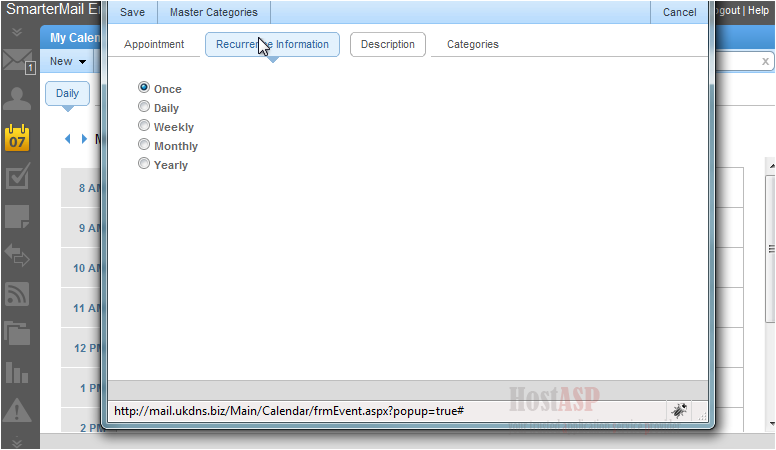
You can set the event to happen once or repeat daily, weekly, monthly or yearly
10) You can type up a description of the meeting. Enter a description here
11) When you are finished, click Save
You can view your upcoming appointments here. The calendar entry we just added appears here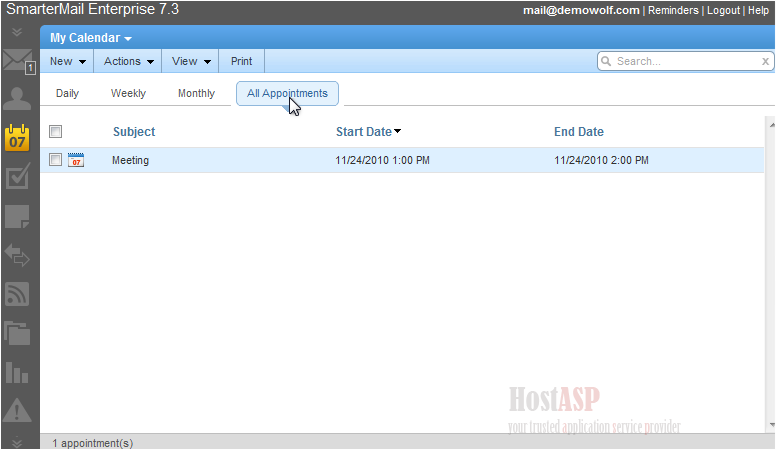
You can also view your calendar by the day, week, month, or view all appointments by using the relevant links in the left pane
This is the end of the tutorial. You now know how to create calendar entries in SmarterMail